
Intro
Features
- Multi-folder scanning: Add one or more folders for analysis. Optionally include subfolders.
- Advanced filtering: Use Include and Exclude masks with wildcards (
*,?) and mask history. - Smart exclusions: Skip reparse points, hard links, and online-only files (e.g. OneDrive, iCloud).
- In-memory database: Faster scans using a RAM-based SQLite database.
- Multiple result modes: Display duplicates by name & size, by content (MD5 hash), or list empty files and folders.
- Structured results view: Two-level hierarchy (groups and files), sortable columns, and checkboxes.
- Context actions: Open files in FileVoyager’s Viewer, or with any system application using Open With.
- Thumbnail preview: Visualize the contents of a duplicate group.
- Auto-selection tools: Automatically select duplicates based on rules (age, order, mask, or location).
- Duplicate management: Move or delete checked files safely.

How to Use
Accessing the Duplicate Finder tool
- Select the folder you want to scan/analyse
- Navigate to the Tools menu.
- Select Duplicate Finder from the dropdown list.

Anatomy of the Duplicate Finder tool

Step 1: Configure scan options
Before starting a scan, open the Options panel to define the scope and behavior of your analysis:
- Include Mask: Specify which files to include. You can use multiple masks separated by
;(e.g.*.jpg;*.png), with*and?wildcards. - Exclude Mask: Define which files to skip using the same syntax.
- Use in-memory database: Stores scan data in RAM for better performance (recommended for faster scans).
- Include subfolders: Enables recursive scanning of subdirectories.
- Ignore Reparse Points, Ignore Hard Links, Ignore online-only files: Useful for avoiding virtual or redundant filesystem entries.
Step 2: Add folders to scan
In the main window, use the folder input field and its Browse button to select directories for analysis.
When you pick a folder:
- You can replace the existing list, or
- Append it to the current set of folders.
You can repeat this process to scan multiple paths in a single run.
Step 3: Start and control the scan
Click Scan to begin the analysis.
During scanning:
- The Scan button becomes Reset database, and allows you to reset the tools.
- The Pause / Resume button lets you temporarily suspend and resume the process.
- The status bar shows the current stage, along with counters for total files, duplicates, and groups.
Step 4: Explore and analyze results
Once the scan is complete, use the result mode buttons to choose what you want to view:
- Duplicate by name and size — Groups files with identical names and sizes.
- Duplicate by content — Groups files that have the same MD5 hash and size.
- Empty folders — Lists directories with no content.
- Empty files — Lists zero-byte files.
The results appear in a Tree view:
- Groups form the first level, with files as children.
- Columns display file details: size, modification date, creation date, last access date, and full path.
- Each item includes a checkbox; selecting a group checks or unchecks all its files automatically.
When selecting a group or file, the thumbnail viewer (to the side) displays image previews for all files in that group.
Step 5: Interact with results
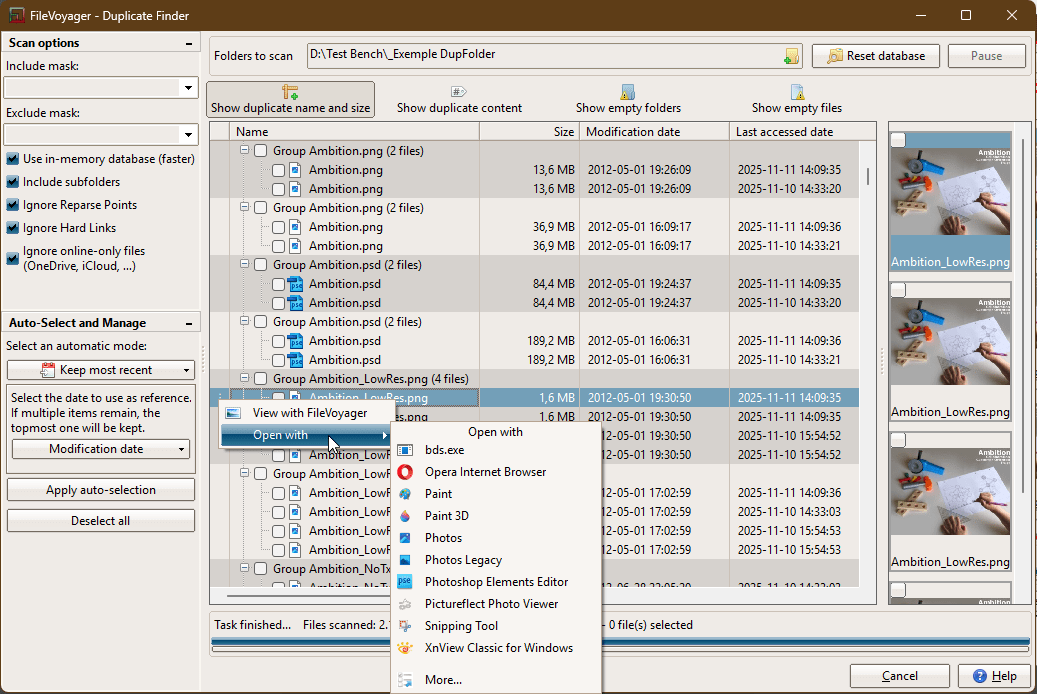
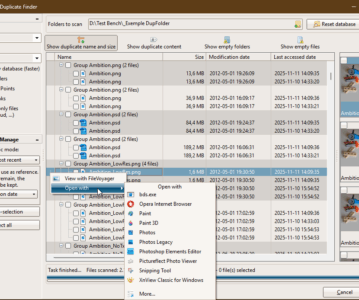
Right-click any file or group (or use the ⋮ button shown when hovering) to open the context menu by right-clicking an item:
- View with FileVoyager
- For groups: opens the first six files in FileVoyager’s viewer, arranged side by side.
- For files: opens the selected file in FileVoyager.
- Open With
- Lists available Windows applications associated with that file type.
- Select one to open the file in that program, or More… to have a larger choice of programs.
Step 6: Auto-select and Manage Duplicates
The Auto-select and Manage panel helps automate the selection and cleanup of duplicates.
Start by choosing an auto-selection mode from the dropdown button. Depending on the selected mode, a small configuration panel will appear below:
- Keep oldest / Keep most recent: Choose which date type to use as reference — Modification date, Last access date, or Creation date.
- Keep first / Keep last: No additional settings required. These simply keep one item per group based on its position.
- Select by filename mask: Enter a file mask (supports
*and?) to automatically select matching files. - Select by folder location: Click the button in the panel to open the Folder Selection Tool, which lists all folders containing duplicates. From there, you can select or deselect folders and even use masks for precision.
Once configured, click Apply auto-selection to mark the appropriate duplicates in the list.
You can reset all selections at any time with Deselect all, or proceed to manage the checked files using the Manage… button.
Step 7: Manage checked files
Once duplicates are selected, use the Manage Duplicates section and click Manage… to open the cleanup dialog.
Choose one of the following actions:
- Move selected duplicates
- Select a destination folder.
- Decide whether you want to confirm overwriting in case of filename collisions.
- Delete selected duplicates
- Delete to the Recycle Bin – Sends files to the Recycle Bin (safe). If not checked, the files will be removed permanently without possible recovery.
Click OK to procedd or Cancel to come back to the main window.
Statistics
The bottom panel displays a summary section:
- Current status and processing stage.
- Total files analyzed.
- Number of duplicates found.
- Number of groups created.
- Number of selected files.
Use Cases
- Free disk space by eliminating redundant backups and downloads.
- Detect duplicate images, music, and documents across multiple drives.
- Clean up empty folders or temporary zero-byte files.
- Retain only the newest or oldest versions of files in versioned directories.
- Prepare data before archiving or migration by removing unnecessary copies.
Troubleshooting
- The scan feels slow
- Enable Use in-memory database.
- Narrow the scan scope using masks or fewer folders.
- Avoid network drives when possible.
- Some files are missing
- Check your Exclude Mask and filters (e.g., “Ignore online-only files”).
- Ensure that hard links and reparse points are not excluded if you need them.
- Auto-selection didn’t check anything
- Verify that your chosen mask or folders actually match the scanned files.
- Remember that one file per group is always left unchecked to avoid full data loss.
- No thumbnails appear
- Thumbnails are shown only for supported file formats. To have a better chance to render the files, right-click them in the Tree view and choose View with FileVoyager
- Check file permissions if the preview fails.
- ‘Open With’ menu is empty
- It relies on Windows registered Association Handlers.
Files without handlers (e.g., unknown extensions) will show no available apps. You can still click the More… button or choose to View with FileVoyager
- It relies on Windows registered Association Handlers.
You must be logged in to post a comment.